I don’t really remember cakes featuring heavily. There was the annual homemade Christmas cake of course, and some special occasions called for a trifle with a Cadbury flake sprinkled on top, but for the most part we were quite a savoury family. I think my mum still scratches her head and wonders how that led to my sister becoming an awesome cake maker, and me spending a little too much of my time creating and writing about chocolatey, sticky, cakey things. When I do think back to my mum cooking in the kitchen, I think of the best turkey roast dinners I have ever tasted (with gravy that’s so amazing you could drink it like soup), her chicken stroganoff (I still demand it whenever I visit) and her legendary fried rice. Foods like samosas, curries, kway teow, chapati, Mee goreng and Nasi goreng - mostly cooked by my dad - also featured quite heavily. Which I guess is quite unusual for the average UK family in the 80’s, but most of that influence comes from the time my he spent in Singapore as a child when his dad was in the army. In my younger years, I used to find a lot of that stuff quite spicy (bless my mum for giving me alternative weird concoctions I liked such as pasta with tuna, cheese and ketchup - blurgh!), but I can’t get enough spicy foods now. This rice is one of my mum’s signature dishes - no need for sauces, or sides. It’s a meal in itself. Of course my sheer greediness does sometime result in me adding an extra side dish - like this sticky pork belly. There are a number of special steps needs to get your rice just right, and I’m going to share them with you today. The first step is boiling the rice. A lot of people struggle with boiling rice and find it overly complicated - buying easy-cook rice (don’t do it!) pre-rinsing it, boiling it in too much water and ending up with soggy rice and having to drain it. Once you get the knack, it’s simple.
How to boil rice:
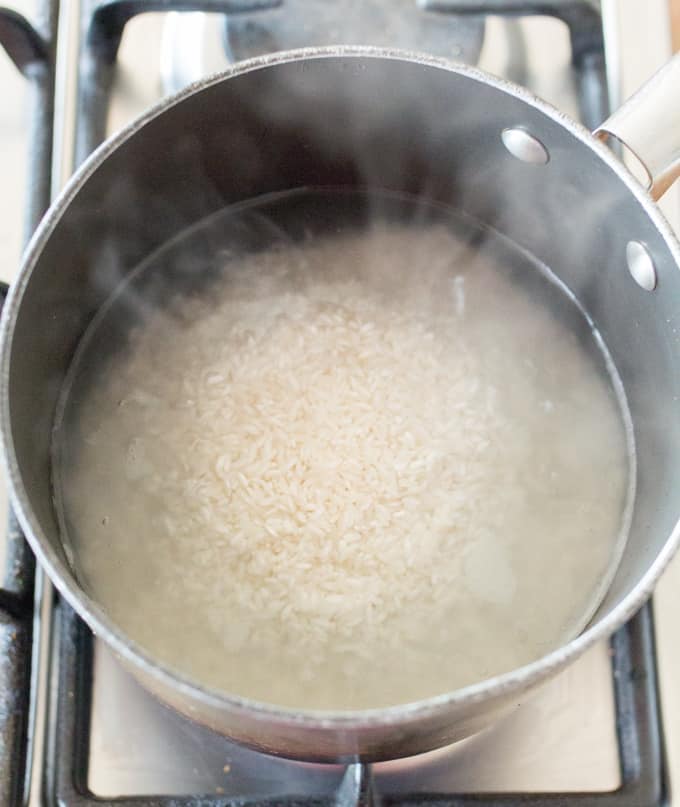
Use regular long grain white rice - not the easy-cook kind. Easy cook might seem simpler, but because it’s got more of a shiny-non-stick exterior when cooked, it simply won’t absorb the flavour as well. I only ever use easy-cook rice for making stuffed peppers - just because it cooks quicker and I want the grains to have a different texture for that recipe. No need to rinse it. Some people think rinsing it is a must to remove the starch and any other nasties, thereby making your rice less sticky. If you buy decent quality (store own-brand is fine) rice, you shouldn’t have this problem. Your rice may be a little clumpy, but shouldn’t be sticky. I prefer rice to be a little bit clumpy - and the clumps are easily brown down with a fork. Pan size - don’t go with too large a pan. You’ll be cooking the rice over a low heat, so a smaller pan is better for even heat distribution. For this tutorial, we’re working on approx 4-6 portions of rice - using a 1.8 - 2.2 litre (approx 1.5 - 2 quart) saucepan. Get the water boiling first, and then add the rice. The amount of water you put in the pan will dictate the amount of rice to add. I fill the sauce-pan approx ⅓ full with water for 6 portions. You can add the rice by eye - simply pour the rice into the centre of the boiling water and keep pouring until a tbsp. or so of rice is above the water - like this:
If you feel you really need to know the quantities, this is generally one part rice to one-and-a-half parts water.
Once you’ve added the rice, give it a quick stir and then place a lid on the pan. Immediately turn down the temperature (don’t wait to bring it back up to the boil again). For gas, cook at the very lowest temperature your hob can manage. For electric or induction, it may need to be a little higher. I use induction level 5 (of 9), because my lowest induction settings are extremely low heat.. You may need to experiment, depending on your electric/induction hob. If you know what number/heat setting you need on your hob to maintain a rolling boil on a pan of water, go about 2 or 3 settings lower than that. Cook for 20 minutes. This allows the rice to cook evenly, without burning the bottom. Don’t stir or open the lid. You can check once after 15 minutes, but if you keep opening the pan, the rice won’t cook (remember you’re only using a very low heat). The rice should be done after 20 minutes. If the rice is still hard and there is absolutely no water at the bottom of the pan, just add in a splash of boiling water and put the lid back on again. Don’t worry about overcooking the rice - so long as you haven’t got too much water in there, the rice can take fair amount of extra cooking - so long as the heat is low. I’ve accidentally left mine for 30+ minutes before now and it was fine.
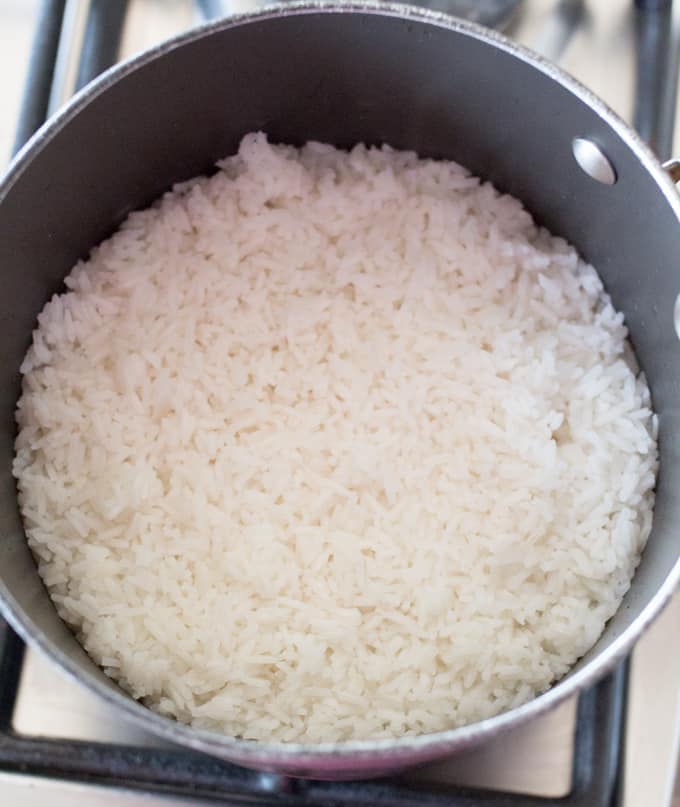
Your rice should look like this when cooked - there should be no water to drain off. If you’re serving it right away (not making it into fried rice), it will need a bit of a fluff with a fork to separate the grains.
There you have it. Once you know the key tips, boiling rice is easy. Check out my full detailed post on how to boil rice.
How to make fried rice:
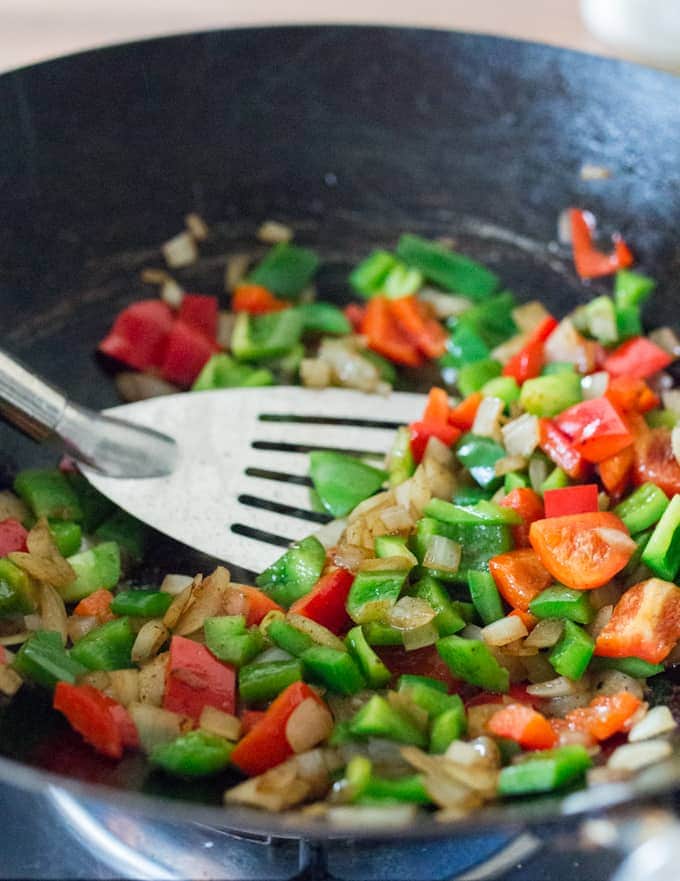
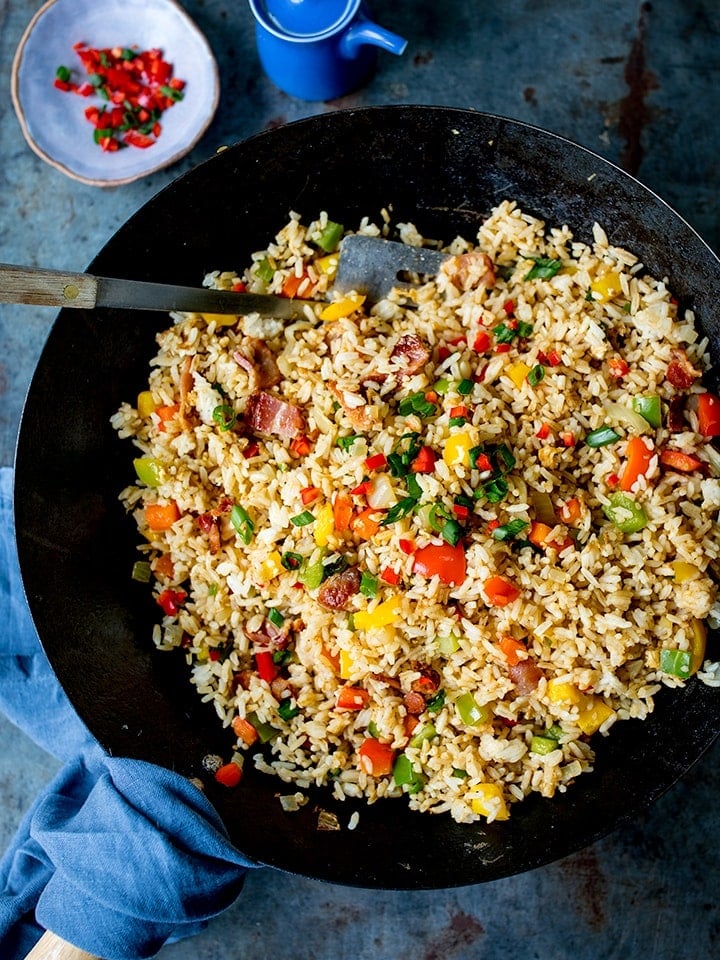
Now, for making fried rice, it’s better to use cold, drier rice. So after boiling your rice, spread it out on a baking tray or in a large dish and leave to cool, uncovered for 20-30 minutes (until room temperature), then cover with clingfilm/plastic wrap and place in the fridge until you’re ready to use. It’s important to cool the rice quickly and use within 24 hours though - as rice is known to occasionally contain bacteria (which can survive being cooked) that can spread quickly in cooked rice if it’s left for long periods. It’s best to use vegetable oil, or another flavourless oil with a high smoke point to cook the rice. Fried rice needs a fair amount of oil, as you want to very lightly coat every grain to get maximum flavour. I tend to work on using about ½ tbsp - ¾ tbsp of oil per person altogether. Fried rice tastes more authentic if cooked in a seasoned, carbon steel wok. In my opinion, non-stick woks don’t give as good a result. Woks with a non-stick coating can’t use the really high heat required for fried rice and other stir fries. The seasoned coating of the wok and the very high cooking temperature gives an enhanced flavour and helps with even (light) browning of the rice. Using a carbon steel wok, also means you can use a metal spatula, instead of a plastic one you’d need to use for a non-stick pan. A metal spatula is best for very high temperatures, and will help scrape the pan better, so nothing sticks. When you’re ready to cook, it’s best to fry off your meat in a little of the oil first and then spoon it out before cooking the rest of the meal. I used bacon, but you can use chicken, chorizo, ham - whatever you fancy. Next, heat more more oil and fry the onions for a few minutes until softened. Then add chillies (if you want it spicy), chopped bell peppers and garlic. Fry until the peppers have started to soften - about 5 minutes.
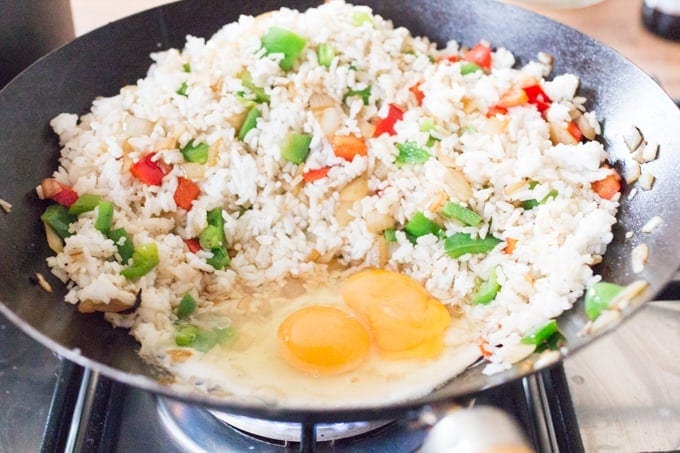
Add in the cold rice and turn up the heat really high. Cook the rice until hot, tossing it around the pan every so often to prevent sticking or burning. If you are using a carbon steel wok (rather than a non-stick one), it’s best to use a metal spatula to keep the rice from sticking. To get the most flavour out of your fried rice, you need enough oil. The oil you added when you cooked the onions and peppers earlier should be enough, and should just coat each rice grain with a light sheen, without the rice looking ‘oily’. Not enough oil and your rice will stick to the pan and will have less flavour. Too much oil and your rice will taste greasy. So check your rice at this point and add in a tiny drizzle more oil if you think it needs it. Once the rice is hot, move it to one side and add the eggs:
Cook the eggs, adding a splash of dark soy sauce and stir with the spatula until they start to scramble, then mix into the rice.
Add in the bacon, heat through and then add in salt, soy sauce and lemon juice. The soy sauce and lemon juice are super important. The soy sauce for that salty, authentic taste, the lemon juice to slightly cut through the oil and carbs in the rice. If you like, you can also stir through a little drizzle of sesame oil at the end. Serve your perfect fried rice topped with spring onions/scallions and finely chopped chillies.
This is perfect as a dinner on its own or a side to go with your favourite Asian main course, like my Sesame Chicken , sticky slow-cooked pork belly or crispy chilli beef!
Check out the recipe video here:
Special Fried Rice Recipe:
This post was first published in March 2015. Updated in April 2019 with new photos, video and recipe tips. Some of the links in this post may be affiliate links – which means if you buy the product I get a small commission (at no extra cost to you). If you do buy, then thank you! That’s what helps us to keep Kitchen Sanctuary running. The nutritional information provided is approximate and can vary depending on several factors. For more information please see our Terms & Conditions.